
To get a passport for your newborn, apply in person using Form DS-11 with your child present, bring the original certified birth certificate plus a black-and-white photocopy on 8.5 x 11-inch paper, show both parents' government-issued photo IDs with front-and-back photocopies, and submit one compliant 2x2 color passport photo. If only one parent can attend, you'll also need a notarized Form DS-3053 or qualifying alternative. Do not sign the DS-11 until the acceptance agent instructs you.
Before you leave the house, confirm you have every item on this list:
- Completed, unsigned Form DS-11 (printed single-sided)
- Child's original certified birth certificate (or Consular Report of Birth Abroad / Certificate of Citizenship)
- Black-and-white photocopy of the citizenship evidence on 8.5 x 11-inch paper
- Both parents' original, valid government-issued photo IDs
- Front-and-back photocopies of both parents' IDs on 8.5 x 11-inch paper
- One compliant 2x2 color passport photo of the infant
- Form DS-3053 (notarized, dated within 90 days) if only one parent attends
- Payment for the Department of State application fee and the facility acceptance fee
- The child, physically present at the appointment
Verify current fees and confirm form versions at travel.state.gov before your appointment, as details can change.
Table of Contents
- What documents do you need for a newborn passport application?
- How does the in-person DS-11 appointment actually work?
- What are the passport photo rules for newborns?
- What are the parental consent rules, and what if one parent can't attend?
- What are the fees and processing times for a child's passport?
- When can you apply after birth, and what if the birth certificate is delayed?
- What happens at the passport acceptance appointment?
- What happens after you submit the application?
- Common reasons infant passport applications get delayed or rejected
- Key Takeaways
- The part most parents overlook
- Passportcenter helps you prepare for every step
- Useful sources and next reading
What documents do you need for a newborn passport application?
Getting turned away at the acceptance facility is the most avoidable setback in this process. Every item below is required; missing even one means a wasted trip.
Proof of U.S. citizenship
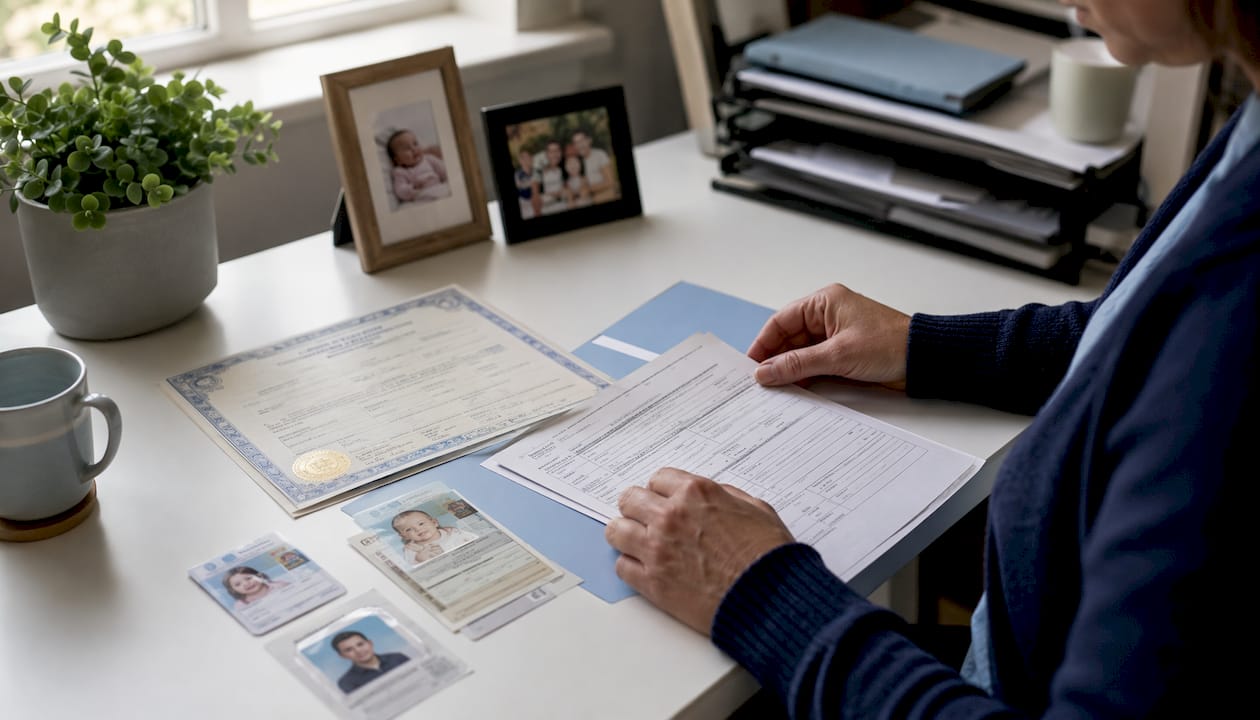
The most common document is the child's certified birth certificate issued by the state vital records office. A hospital-issued souvenir certificate is not acceptable. Other qualifying documents include a Consular Report of Birth Abroad (Form FS-240) or a Certificate of Citizenship. Submit the original plus a photocopy on 8.5 x 11-inch paper in black-and-white ink. The acceptance agent keeps the photocopy; the original is returned to you.
Proof of parental relationship
For most newborns, the certified birth certificate serves double duty: it proves both U.S. citizenship and the parent-child relationship. If the birth certificate does not list both parents, an adoption decree or court order may be required to establish the relationship.
Parents' photo IDs and photocopies
Both parents must present an original, valid government-issued photo ID, such as a U.S. driver's license or a valid U.S. passport. Submit a front-and-back photocopy of each ID on 8.5 x 11-inch paper. If your ID has no printed information on the back, a copy of the front alone is sufficient. For guidance on what qualifies as acceptable identification, the secondary ID requirements page on Passportcenter covers the full list.
Form DS-11 and Form DS-3053
Print Form DS-11 single-sided and do not sign it before the appointment. The acceptance agent administers an oath and witnesses your signature on-site. If only one parent can attend, the absent parent must submit a notarized Form DS-3053 (Statement of Consent) that includes the child's full name and date of birth, is signed and notarized on the same day, and is no more than 90 days old at the time of submission.
Fees and payment
Two separate fees apply: the Department of State application fee and the facility acceptance fee. You typically need two separate payments. Check whether the facility accepts checks, money orders, or credit cards before you arrive, since not all acceptance facilities take every payment method.
| Document Type | Passport Book | Passport Card | Book + Card |
|---|---|---|---|
| Dept. of State application fee | $100 | $15 | $115 |
| Facility acceptance fee | $35 | $35 | $35 |
| Total | $135 | $50 | $150 |
Fees sourced from the Department of State child passport page as of 2024. Verify current amounts before your appointment.
A passport card is valid for land and sea travel between the U.S., Canada, Mexico, Bermuda, and the Caribbean. If you plan any international air travel, you need the passport book. Most parents apply for both at the same appointment to save a return trip.
How does the in-person DS-11 appointment actually work?
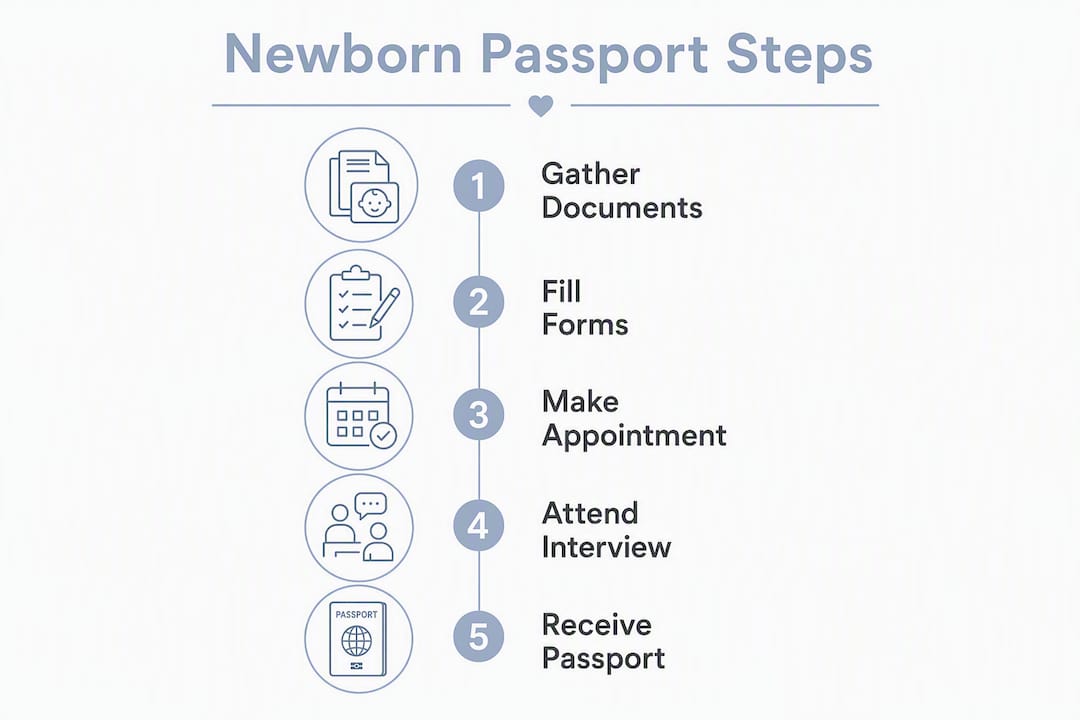
The Department of State's step-by-step guidance lays out the sequence clearly. Here is what to do, in order.
- Complete Form DS-11 online using the State Department's online form filler at pptform.state.gov, then print it single-sided. Do not sign it.
- Gather all originals and photocopies as listed in the documents section above. Pre-print the photocopies at home so you are not scrambling at the facility.
- Find an acceptance facility. Use the locator at iafdb.travel.state.gov to find a USPS location, library, county clerk, or court that accepts passport applications. For urgent travel, a Regional Passport Agency handles appointments directly, but those require proof of imminent travel.
- Schedule your appointment. Many USPS locations and other acceptance facilities require appointments. Book online or by phone, and confirm the facility accepts child applications.
- Arrive with the child and both parents (or one parent plus the notarized DS-3053). Bring the diaper bag. Appointments with a newborn take longer than you expect.
- Present all documents to the acceptance agent. They will review originals, retain the photocopies, and check that the DS-11 is unsigned.
- Take the oath and sign Form DS-11 when the agent instructs you. Signing before this step invalidates the form.
- Submit the passport photo and pay both fees. Get a receipt with your application tracking number.
- Keep the receipt. You will need the information on it to check your application status online.
Pro Tip: Not all acceptance facilities take passport photos. Call ahead to confirm. If the facility does not offer photos, bring two pre-printed, compliant 2x2 photos from a pharmacy or professional service. Showing up without a photo when the facility cannot take one means rescheduling.
What are the passport photo rules for newborns?
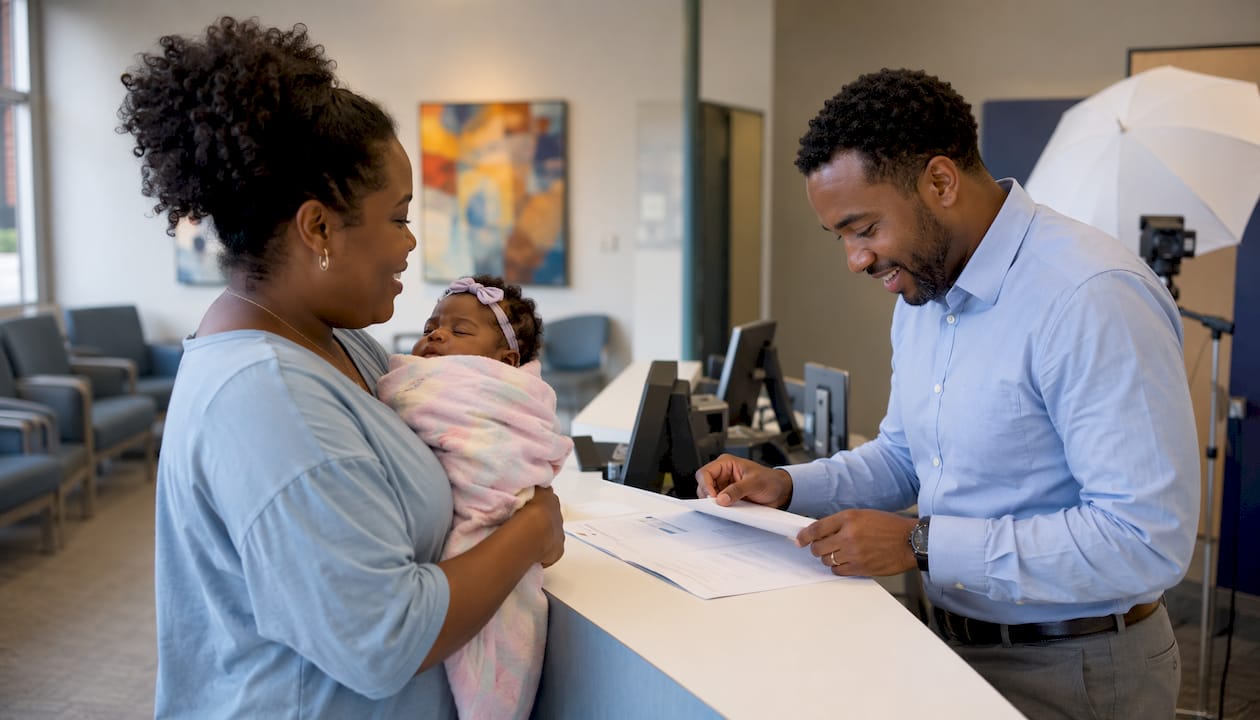
Infant passport photos are rejected more often than adult photos, mostly for reasons parents could have caught beforehand. The State Department requires a 2x2-inch color photo showing a full front view of the face against a plain white or off-white background, with no shadows on the face or background.
Official photo specs at a glance:
- Size: 2x2 inches
- Background: plain white or off-white, no patterns
- Expression: neutral, both eyes open (though infants are given some flexibility)
- Head position: facing directly forward, full face visible
- No hats, headbands, or accessories covering the head
- No other people or hands visible in the frame
Getting a compliant newborn photo takes some patience. These techniques work:
- Lay the baby on a plain white sheet or white pillowcase on a flat surface. This creates the plain background without needing a photo booth.
- Take the photo from directly above while the baby lies on their back. The face is naturally forward-facing and the background is automatically plain.
- Shoot during a wakeful period after a feeding, when the baby is calm and eyes are likely open.
- Use natural light near a window rather than a flash, which causes harsh shadows.
- Take 20 or more shots and select the best one. Newborns move constantly.
Common rejection reasons for infant photos:
- Shadows on the face or background
- Eyes closed or partially closed
- Another person's hands visible supporting the baby's head
- Background that is not plain white or off-white
- Photo printed at the wrong size
For a full breakdown of size specs and acceptable examples, the infant passport photo guide on Passportcenter covers every requirement in detail.
Pro Tip: Print at least three copies of your best photo before the appointment. If the acceptance agent rejects one for a minor issue, having extras on hand means you can often resolve it on the spot rather than rescheduling.
What are the parental consent rules, and what if one parent can't attend?
Both parents or legal guardians must appear in person with the child at the acceptance facility. This rule exists specifically to prevent international parental child abduction, and acceptance agents enforce it consistently.
When only one parent can attend, you must submit one of the following:
- Form DS-3053 (Statement of Consent): The absent parent signs and has the form notarized on the same day. The notarization must be dated within 90 days of submission. Include a front-and-back photocopy of the absent parent's government-issued photo ID with the form.
- Death certificate: If the second parent is deceased, submit the original or certified copy.
- Court order granting sole custody: A court order that gives one parent sole legal authority to apply is accepted as primary evidence of sole authority.
- Form DS-5525 (Statement of Exigent/Special Family Circumstances): A sworn statement made under penalty of perjury explaining in detail why the second parent is unavailable. This is a last resort and is scrutinized carefully.
If the absent parent is outside the United States, Form DS-3053 can still be used, but it may need to be notarized at a U.S. embassy or consulate abroad. Acceptance of foreign notarizations varies, so contact the nearest U.S. embassy or consulate before relying on this option.
Pro Tip: If you are using DS-3053, check the notarization date the morning of your appointment. A form notarized 91 days ago will be rejected outright, forcing a rescheduled appointment. Some states permit electronic notarization, but you must submit a printed copy regardless.
What are the fees and processing times for a child's passport?
The fee table in the documents section above covers the core costs. Beyond fees, processing time is the variable that catches most parents off guard.
Standard processing times fluctuate based on application volume. Check current processing times on Passportcenter before you apply, since timelines shift throughout the year. The State Department posts updated estimates at travel.state.gov.
Expedited options:
- Expedited service by mail: Pay an additional fee on top of the standard application fee to request faster processing. For child applications, this still requires the in-person acceptance step first; the expedited request is submitted with the application.
- Regional Passport Agency appointment: For travel within a short window, parents can request an appointment at a Regional Passport Agency. Proof of imminent travel is typically required, such as a flight itinerary or booking confirmation. These appointments are not walk-in; you must call the National Passport Information Center at 1-877-487-2778 or use the online appointment system.
Key validity note: Child passports are valid for 5 years and cannot be renewed. When the passport expires, your child must apply in person again with a new DS-11 and a full set of documents. There is no renewal shortcut for children under 16.
Bullet summary for urgent travel:
- Confirm your travel date and calculate how many weeks remain.
- Check current standard and expedited processing times at travel.state.gov.
- If travel is within a few weeks, call 1-877-487-2778 to request a Regional Passport Agency appointment.
- Have proof of travel (itinerary, booking) ready when you call.
- Passportcenter provides guidance on navigating expedited options but does not replace official State Department services.
When can you apply after birth, and what if the birth certificate is delayed?
There is no specific earliest waiting period after birth. You can apply as soon as you have the certified birth certificate in hand. The practical bottleneck is almost always the birth certificate, not the passport process itself.
State vital records offices typically take several weeks to issue a certified birth certificate after delivery. Some states are faster; others run longer during high-volume periods. Request the birth certificate from the vital records office immediately after delivery, not when you start thinking about travel.
If the birth certificate is delayed:
- Request expedited processing directly from the state vital records office. Most states offer this for an additional fee.
- Do not schedule your passport acceptance appointment until you have the certified birth certificate confirmed. Arriving without it means the application cannot be submitted.
- If you have a proof-of-application receipt from the vital records office, that receipt alone is not sufficient for the passport application. You need the actual certified document.
- For situations where a passport arrives before a birth certificate, the parent guide on that scenario on Passportcenter walks through what to expect.
Pro Tip: Call your state vital records office and ask for an estimated issuance date. If you have upcoming travel, explain the timeline. Some offices can prioritize requests when travel documentation is involved.
What happens at the passport acceptance appointment?
Knowing the sequence in advance removes most of the stress. Here is exactly what the acceptance agent will do and what you should have ready.
What the agent checks:
- Original citizenship evidence (certified birth certificate or equivalent) and your pre-printed photocopy
- Proof of parental relationship (usually the same birth certificate)
- Both parents' original photo IDs and front-and-back photocopies
- Completed, unsigned Form DS-11 (printed single-sided)
- Compliant 2x2 passport photo
- DS-3053 or alternative consent document if only one parent is present
- Payment for both fees
Sequence of the appointment:
- Check-in and document review by the acceptance agent
- Agent verifies originals against photocopies and confirms the DS-11 is unsigned
- Agent administers the oath; you sign Form DS-11 in their presence
- Photo is reviewed and accepted (or you submit a pre-printed photo)
- Payment collected; two separate payments are standard
- Agent provides a receipt with your application locator number
Day-of checklist:
- Diaper bag with supplies for a 30–45 minute outing
- All original documents in a folder, not loose
- Pre-printed photocopies on 8.5 x 11-inch paper
- At least two compliant 2x2 passport photos
- Two separate payment methods (check, money order, or card depending on the facility)
- Confirmation of your appointment time and facility address
The photocopies rule is worth repeating: the acceptance agent retains your photocopies. Pre-printing them at home means the agent can process your application without delays or on-site copying.
What happens after you submit the application?
Once the acceptance agent submits your application, the waiting begins. Here is how to stay informed and what to do if something goes wrong.
Tracking your application:
- Visit passportstatus.state.gov and enter your last name, date of birth, and the last four digits of your Social Security number (or your child's, as applicable).
- Wait at least 14 business days after submission before checking, as applications typically do not appear in the system immediately.
- You can also call the National Passport Information Center at 1-877-487-2778 for a status update.
What to expect in the mail:
- The passport book and/or card arrives by mail, typically in a separate envelope from the returned original citizenship documents.
- Check the passport immediately upon receipt. Verify the name spelling, date of birth, and photo. Errors must be reported to the State Department promptly.
Post-receipt tasks:
- Do not sign the passport on behalf of the child. Children's passports are not signed.
- Store the original certified birth certificate with the passport. Some airlines and destination countries ask for both documents when traveling with an infant.
- Check the destination country's passport validity requirements before travel. Many countries require a passport to be valid for at least six months beyond your travel date. A child's 5-year passport can expire sooner than you expect if the child is young when it is issued.
Common reasons infant passport applications get delayed or rejected
Most rejections are preventable. These are the issues acceptance agents flag most often.
Top rejection causes:
- Incorrect photo: Shadows, eyes closed, wrong background, wrong size, or another person's hands visible
- Missing originals: Photocopies submitted without the originals, or a hospital birth certificate instead of a certified vital records copy
- Missing photocopies: Originals brought but no 8.5 x 11-inch photocopies prepared
- Signed DS-11: Form signed before the oath at the facility
- Expired parental ID: A driver's license or passport that has expired is not acceptable
- Stale DS-3053: Notarization dated more than 90 days before submission
- Improperly notarized DS-3053: Signed and notarized on different days, or missing the photocopy of the absent parent's ID
How to verify before you go:
- Run through the document checklist in the first section of this guide the night before.
- Hold the passport photo against a plain white background and check for shadows, visible hands, and correct framing.
- Check the expiration date on every ID you plan to present.
- If using DS-3053, count the days from the notarization date to your appointment date. If it is 88 days or more, get a fresh notarization.
If the application is rejected or returned:
- Read the rejection notice carefully. It will specify exactly which document or requirement was not met.
- Correct only the flagged issue, then reapply at any acceptance facility. You do not need to return to the same location.
- If documents were returned with the rejection, verify they are all present and undamaged before reapplying.
Key Takeaways
A successful newborn passport application comes down to one thing: arriving at the acceptance facility with every required original, every required photocopy, a compliant infant photo, and both parents present or a valid notarized DS-3053.
| Point | Details |
|---|---|
| Apply in person with DS-11 | Complete Form DS-11 online, print single-sided, and do not sign until the acceptance agent instructs you. |
| Bring originals and photocopies | Submit the certified birth certificate and both parents' IDs as originals, plus black-and-white photocopies on 8.5 x 11-inch paper. |
| Both parents or DS-3053 required | Both parents must appear, or the absent parent must submit a notarized DS-3053 dated within 90 days of submission. |
| Child passports are valid 5 years | Children under 16 cannot renew; they must apply in person each time with a full set of documents. |
| Check destination validity rules | Many countries require a passport valid for at least six months beyond your travel date — verify before booking. |
| Use Passportcenter for guidance | Passportcenter provides free guides on infant photos, processing times, and expedited options to help you prepare. |
The part most parents overlook
Most of the stress around a newborn passport application comes from uncertainty, not complexity. The process itself is straightforward once you understand that it is essentially a document-verification exercise with a fixed checklist. The State Department is not trying to make this hard. What trips parents up is the gap between knowing the rules and actually executing them under time pressure with a newborn in tow.
The detail that gets skipped most often is the photocopy preparation. Parents bring originals, which is correct, but they assume the facility will handle copying. Some do. Many do not. Showing up with pre-printed, 8.5 x 11-inch photocopies of every document is the single easiest way to cut your appointment time in half and eliminate the most common source of on-the-day delays.
The second overlooked point is the DS-3053 expiration window. Ninety days sounds like plenty of time. But parents who get the form notarized early, then delay the appointment for a few weeks, sometimes arrive with a form that is 91 or 92 days old. The agent cannot accept it. The application does not move forward. A fresh notarization takes 20 minutes; a rescheduled appointment can take weeks.
Plan the appointment for within two weeks of the notarization date if you can. Prepare your photocopies the night before. Bring extra photos. These are not complicated steps. They are just the ones that separate a smooth appointment from a frustrating one.
Passportcenter helps you prepare for every step
Gathering documents, timing the birth certificate, navigating expedited options when travel is urgent — there is a lot to coordinate when applying for a first passport for a newborn. Passportcenter is a free resource built specifically to help U.S. parents cut through the confusion and arrive at their appointment fully prepared.
The site covers infant photo requirements, current processing times, parental consent rules, and how to find acceptance facilities near you. If your travel timeline is tight and you need guidance on expedited options or registered courier services, Passportcenter can point you in the right direction without the guesswork. Official fees and forms remain the responsibility of the U.S. Department of State, and Passportcenter does not replace that process. What it does is give you a clear, plain-language explanation of every step before you walk into the acceptance facility.
Visit passportcenter.ai to access free guides, photo requirement walkthroughs, and processing time updates for your child's passport application.
Useful sources and next reading
These are the primary sources you should verify before your appointment, since fees, processing times, and form versions are updated periodically.
Official U.S. government sources:
- Apply for a Child's Passport Under 16 — travel.state.gov: The authoritative page for requirements, fees, and form links.
- Steps to Apply for a Child's Passport (Department of State PDF): The official eight-step checklist in printable format.
- Get a passport for a minor under 18 — USA.gov: Plain-language overview with links to forms and agency contacts.
- Application for U.S. Passport — DS-11 online form filler: Complete and print Form DS-11 here before your appointment.
- Photo ID and photocopy rules — travel.state.gov: Exact specifications for acceptable IDs and photocopy requirements.
Passportcenter resources:
- Infant passport photo requirements guide: Full photo specs with examples and rejection checklist.
- Received passport before birth certificate: parent guide: What to do when documents arrive out of sequence.
- Current U.S. passport processing times: Updated processing time ranges and what affects them.
- Passportcenter.ai home: Free guides, appointment tools, and expedited service guidance.
This article is general information, not legal advice. Verify current fees, processing times, and form requirements directly with the U.S. Department of State at travel.state.gov before submitting your application.